Burrito Bowls
Posted: 3 September 2015 Filed under: Food, Mexican, Summer, Tomatoes 3 CommentsThis isn’t a real post. And I don’t know when I’ll be able to get a second post going. I know it’s been years since my last post. Life sort of got in the way. There was the year where I didn’t have my own kitchen, then we bought a house and spent several months updating and making it our own. Then we had a baby. He’s super cute. You get the point. Busy people, etc.
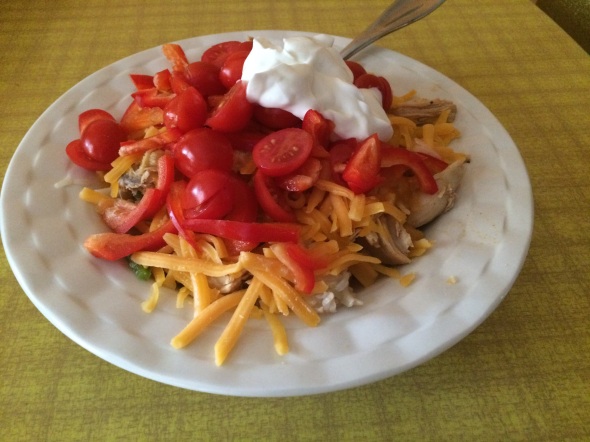
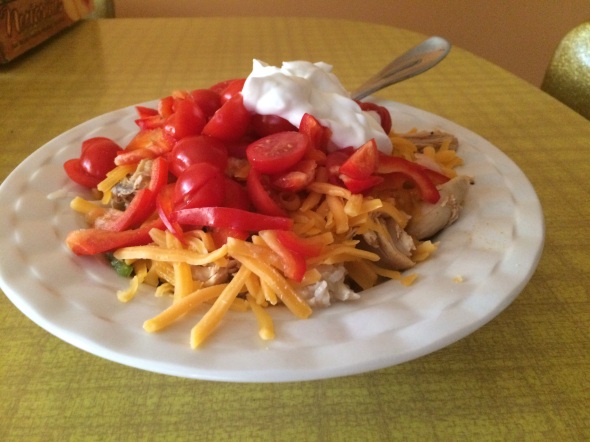
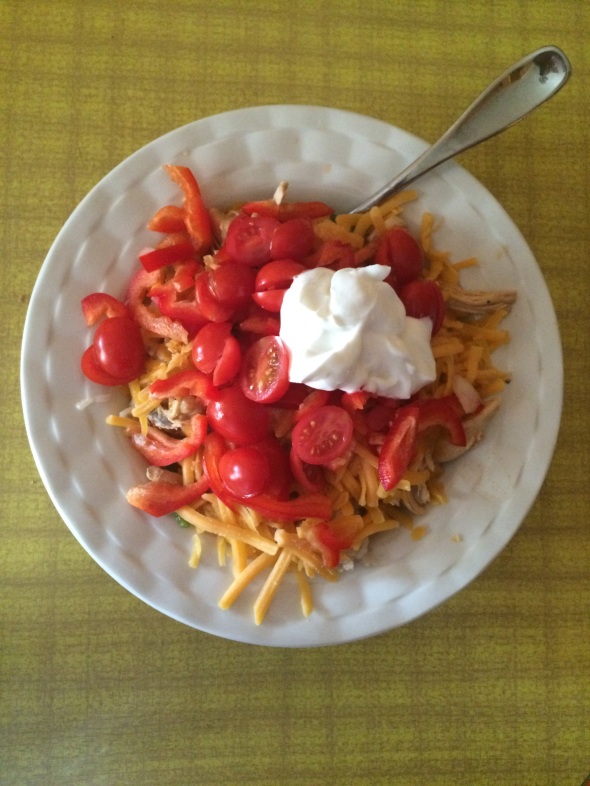
So this isn’t a real blog post, it’s just my dinner last night and when I finished making it I thought, “damn that looks too pretty not to take a picture of it and if I’m going to take a picture of it maybe I should write about it.” It’s just a quick at-home version of Chiptole’s burrito bowls. The best part, for me, of this dinner was that we grew the bell pepper, jalapenos and tomatoes in our garden. For the first time in years of gardening all of our plants are producing like crazy. It’s definitely making up for the years we spent at the community garden, filling a water barrel with a hose hooked up to a fire hydrant down the block and never getting any good tomatoes because squirrels, mice and humans would steal them.
Anyway, honestly I don’t know if I’ve actually written this post already. I might have but I don’t have time to go back and check and hey, even if I did, it was years ago. You could probably use a refresher on burrito bowls, right? They’re really complicated. At the very least, here are some pictures of my dinner. PS I hope you like cell phone pictures!
1 cup long grain brown rice
two chicken breasts – already cooked is best
1/4 onion
two fresh jalapeños
1 red bell pepper
cherry/grape tomatoes
shredded cheese
greek yogurt
Boil your rice and once it’s mostly cooked add some chopped onion. I find this gives some good flavor while easing the bite of the onion. While the rice is boiling, get your meat ready. I used leftover chicken breast from a previous dinner. Just gently shred it, toss it into a microwavable dish with a cover, add two fresh jalapeños, thinly sliced, some chili powder a little salt pepper and garlic and enough water so the chicken is covered about halfway. Microwave for six minutes stiring once halfway through. Make sure you take the seeds out of the jalapeños or you’ll probably burn your mouth off.
Chop the pepper and slice it the cherry tomatoes in half. That’s it for cooking, once the rice and chicken are done just build your bowl. A layer of rice, a layer of chicken, top with some cheese sprinkle on your red bell pepper and your tomatoes, and finally top with a little scoop of Greek yogurt. Done.
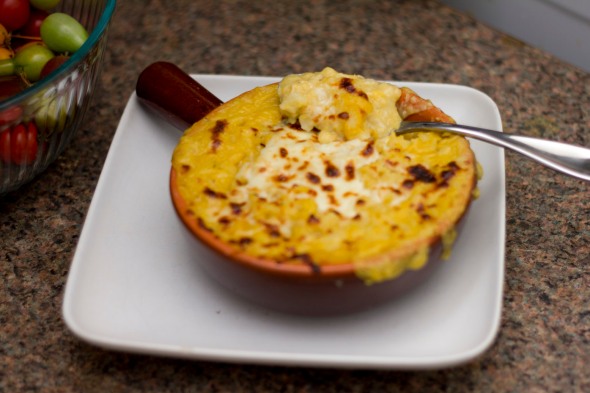
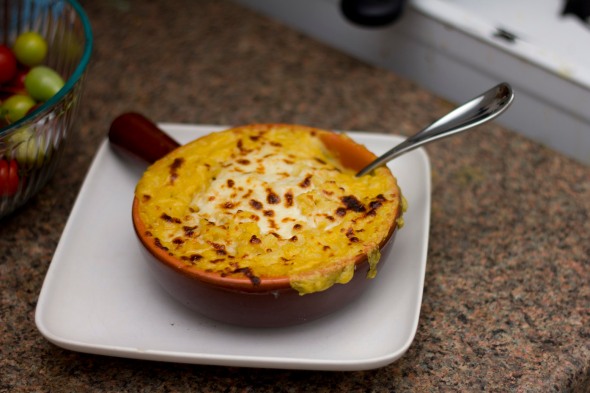
Butternut Squash Macaroni and Cheese
Posted: 15 November 2012 Filed under: Cheese, Food, Pasta, Squash | Tags: Baked Pasta, Butternut squash, Mac and Cheese, Macaroni, Vegetarian 3 Comments
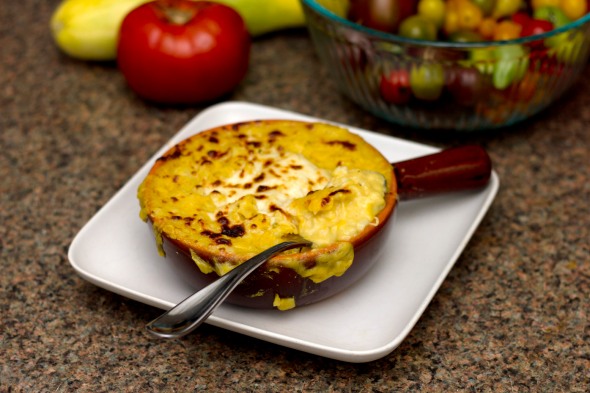
I’ve been holding out on you, dear readers. I have a recipe that is delicious, indulgent, healthy, cheap, easy and can feed one person or 20. And I’ve been making it for over a year. I’ve brought it to Christmas parties, work pot-lucks and summer barbecues. I’ve made it so many times and each time I think, “I’m going to blog about it this time, I swear!” But each time I forget to take a photo. Or the lighting isn’t right for a photo. Or it’s in the Crock Pot and the photo won’t look very nice. Oh yeah, that’s the other thing that stopped me from writing this post sooner. I’ve prepared this dish at least five different ways. You can make it on the stove top and serve it. You can bake it in the oven and brown the top and add some breadcrumbs. You can broil individual servings for the best cheesy, crunchy experience ever. You can make it on the stove and then transfer to the Crock Pot for parties and transport.
The recipe is for Butternut Squash Mac and Cheese. It’s a hybrid of the dairy-free concoction that’s been around the blogosphere for a few years and a traditional mac and cheese recipe. In the dairy-free version, cashews are soaked in water and then blended with the squash for a ‘cheez’ flavor. I have no problem with dairy and cashews are expensive, so I just used real cheese. And milk. And breadcrumbs. So while this is not the same as the dairy-gluten-free recipe, it has one thing in common. Squash!!!!! This is a far, far healthier version of mac and cheese than the classic variety where you dump a box of Velveeta (which I love, despite everything I know about it) in some noodles with milk and butter and call it a day. Sure, it’s delicious but it’s got enough sodium and fat to last three weeks.
There are so many reasons that this recipe rocks. First of all, butternut squash is a superior food. It just is. It’s delicious in everything. It’s easy to prepare, it’s easy to store, it’s high in flavor and low in calories. There’s a reason you see it in so many dishes. Another reason this recipe rocks is how few ingredients you’ll actually need. This stuff tastes gourmet. I have never brought this recipe to a party or function and left without at least one request for the recipe. I hope that people are pleasantly surprised when they find out it’s really just squash, milk, noodles, a bit of cheese, fresh rosemary, and the staples of all meals: garlic, sea salt and black pepper. Breadcrumbs are optional but I never use them for a party dish because they’ll get soggy in the Crock Pot. Unlike regular mac and cheese, the sauce starts out as a solid. You will need to add liquid and find a way to blend the liquid and squash together to make it a creamy sauce. I use my immersion blender. You could use a food processor, a hand-mixer or even a whisk if you’d like.
Finally, this mac and cheese is crazy delicious. I can say without hesitation, I have never had better mac and cheese in my life. Senor has volunteered to bring it to a number of parties and every time, he waits anxiously until everyone has tried some before announcing that it’s made with squash and not cheddar cheese. Last night he reminded me, “It’s one of your best, you know.” So you can take that as a resounding endorsement.
A few notes – you can honestly use as much squash in this recipe as you’d like. I usually around 3 cups of roasted squash but the more you add, the more sauce you’ll have. You may need to add more liquid to keep it smooth. With this recipe, you want a higher sauce-to-noodle ratio than you would with normal mac and cheese. Also, the sauce gets thick FAST. If you like a creamy sauce you may need more liquid. It’s very easy to smooth out the sauce at any time so if you’re worried that it’s a bit too dry, wait until just before serving to add a small amount of water/milk at a time and stirring.
Butternut Squash Mac and Cheese
Serves 16+
1 box whole wheat elbow macaroni
1 medium-large butternut squash, peeled and roasted until tender (or 3 boxes of frozen squash puree) (you can’t have too much squash in this recipe!)
2 cups milk
1/2 cup water
2-3 cups shredded mozzarella
3-4 ounces hard, sharp cheese like smoked gouda, parmesan, asiago, etc.
Garlic, salt, black pepper, several sprigs fresh rosemary
*4 Tablespoons nutritional yeast (optional – this adds b vitamins and fiber and also bumps up the cheesy flavor)
*Half a cup Panko bread crumbs (optional – for oven baked option)
For the crock pot or stove top:
Boil the noodles in a small stock pot until just tender. Rinse and drain. (If you plan on using a crockpot, under cook the noodles slightly or they’ll turn to mush.)
In a large sauce pan, combine squash, milk, water, sharp cheese, nutritional yeast over medium heat. Stir in salt, pepper, and a ton of rosemary. To get the sauce smooth I use a stick blender (immersion) to smooth out the squash and finely chop the herbs. You could also use a food processor or a blender. Or, you could chop the rosemary and then use a hand mixer to smooth out the squash. A stick blender is the easiest option.
Let the sauce simmer. Give it a taste now and then and adjust the spices to taste. This sauce thickens very well and rather quickly. If it seems a bit too thick, add more water/milk. Follow directions below for three prep options.
For stove top – combine the noodles and sauce in a stock pot over low heat. Stir to combine. If the sauce is too thick to coat properly, add more liquids. Once the sauce is the right thickness and everything is covered properly, remove from heat and add 2 cups of shredded mozzarella and stir to incorporate. Top each bowl with a light sprinkle of cheese and serve.
For crock pot – Layer the noodles/sauce/shredded cheese into the crock. You will want the sauce to be slightly thinner than the stove top variety. It will thicken quickly. You can also add a bit more water or milk and stir just before serving if it gets too thick. Turn the crock pot onto low and stir occasionally. You may want to add shredded cheese to the top five minutes before serving.
For the broiler – follow the stove top directions. Use oven and broiler-safe bowls to serve the pasta. Top each with shredded mozzarella and a sprinkle of bread crumbs. Place under the broiler for 2-3 minutes until the cheese starts to bubble and brown. This will go quickly from just right to burned, so keep your eye on it.
Roasted Corn and Tomato Spaghetti
Posted: 25 September 2012 Filed under: Food, Italian, Mexican, Pasta, Summer, Tomatoes | Tags: Mexican Spaghetti., Noodles, Tomatoes, Vegetables 1 Comment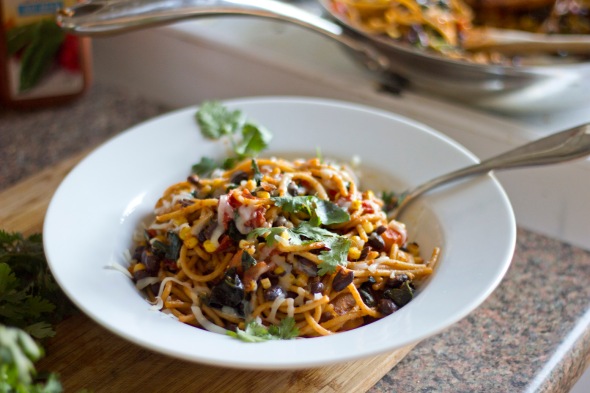
I have to be honest. I don’t create many fusion dishes. I’m not sure I have the expertise of any one genre so firmly under my control that I feel able to mash two of them up together. Before this recipe, I’d never tried it at all. That I can remember. And no, using spaghetti noodles in ramen instead of Udon noodles doesn’t count.
This was very much an attempt to use up fresh produce without it going bad and without getting bored of the same flavor combinations. While I could possibly eat nothing but tomatoes and basil all summer long, I fear that Señor may crave more diversity than that. Actually, I could probably convince him to eat just tomatoes and basil for a week or two. But still. That’s not very well-balanced now is it?
We both love Mexican food, thus our taco bar wedding reception. That taco bar was delicious and friends have told me they’re still dreaming about the amazing food. For real, she just said it this weekend. I wouldn’t lie about something so serious. And in all honesty, we are STILL eating through the leftovers. We had a small guest list and we had 20 percent of our responded guests not show. So we had a ton of leftovers. We’re almost done with them but the overwhelming amount of taco meat, tortilla shells and refried beans in our freezer definitely affected our desire to make tacos.
This recipe was my best attempt at bringing delicious Mexican food back into our lives without it looking or tasting anything like the beef, chicken, beans and rice in our freezer. It totally worked. In the heat of summer, I used canned beans instead of boiling my own. I didn’t have to plan this recipe in advance, I just dumped everything together and off we went. The corn had been roasted on the grill a few days earlier and was caramelized and smoky. The cilantro and basil were both about to turn. And thankfully, tomatoes are a staple of both cuisines. Which is maybe why I love them both so much? Or maybe that’s unrelated and it’s just that they’re awesome. That’s probably more likely.
In this dish, roasted grape tomatoes make most of the ‘sauce’ that covers the noodles, beans, corn and herbs. In the effort of full disclosure, this was delicious as a hot main dish and the a cold lunch the next day. This is also a super easy recipe to feed a bunch of dietary restrictions. Gluten free? Swap out the whole wheat noodles for brown rice noodles. Vegan or lactose intolerant? Skip the cheese topping. Delicious and versatile. I love that.

Roasted Corn and Tomato Spaghetti
(makes four servings)
8 oz whole wheat spaghetti noodles
20-30 grape tomatoes
2 cobs roasted corn (approximately 1 cup of kernels)
1 can black beans
1 tablespoon olive oil
1 tablespoon chili powder
1 tablespoon granulated garlic
1 teaspoon ground cumin
Dash of salt, black pepper, cayenne
Fresh cilantro
Fresh basil
1/2 cup shredded cheese
Heat oven or toaster oven to 400 degrees. Be sure to let the noodles drain for a few minutes before tossing them with the dish to keep excess water from creating a soupy dish.
Prepare the noodles according to package directions.
While the water is heating, place the tomatoes in a single layer on a foil-lined baking sheet. Place in the oven or toaster oven for roasting. I prefer the toaster oven because the tomatoes sit closer to the heating element and finish roasting much faster. The tomatoes are ready when the skins are shriveling and there is some liquid on the foil.
Using a sharp knife, cut the kernels off the cobs of corn.
Drain the beans and rinse well. Let drain for five minutes to remove any excess liquids.
Place six ounces of water in a glass measuring cup. Add the chili powder, garlic, cumin, salt, pepper and cayenne. Stir and microwave the mixture for 45 seconds.
Add the olive oil to a large skillet. Heat on medium. Add the water and spice mixture. Toss the black beans and corn in the skillet until the spices are fragrant. Add the noodles and roasted tomatoes to the skillet and gently toss to incorporate. Adjust spices as necessary.
Tear whole cilantro and basil leaves off a clean bunch of each herb. When the pasta is just about ready to serve, remove from heat and toss a handful of both cilantro and basil with the dish.
Serve immediately; garnish with fresh cilantro, basil and shredded cheese.
Zucchini and Fettuccine Alfredo
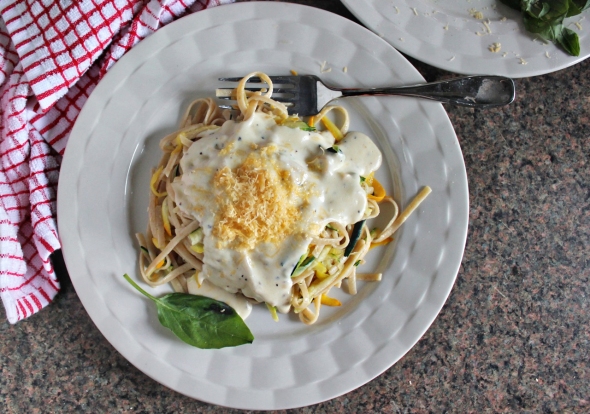
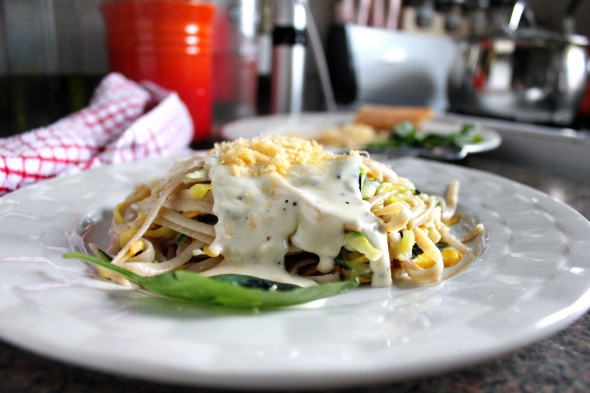
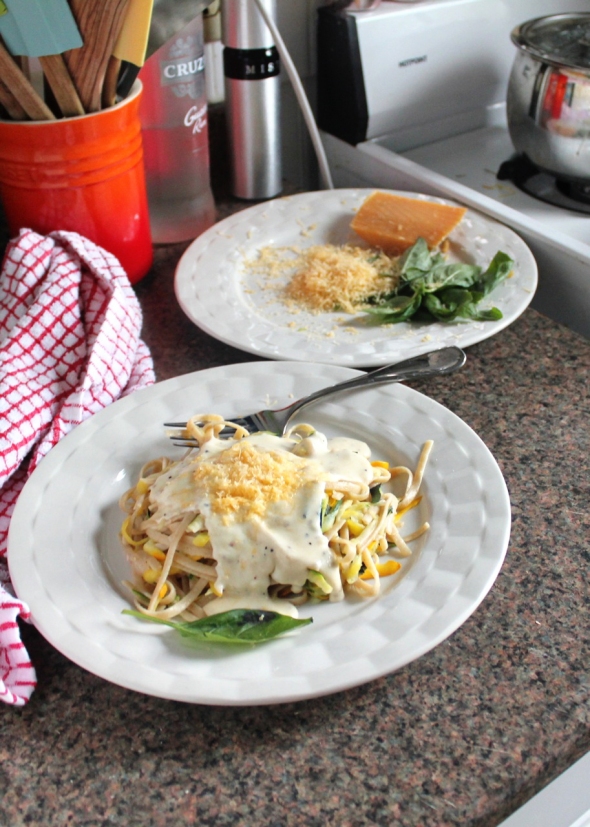
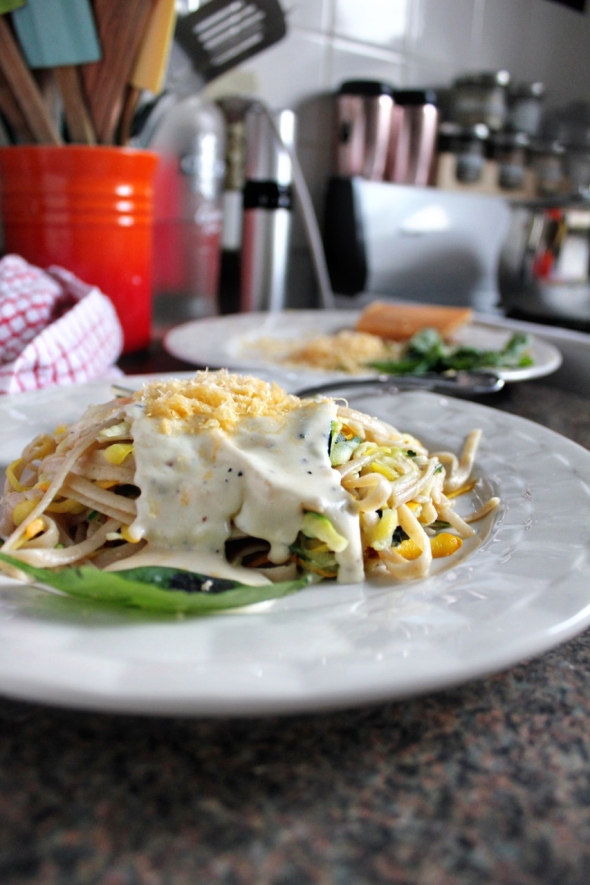
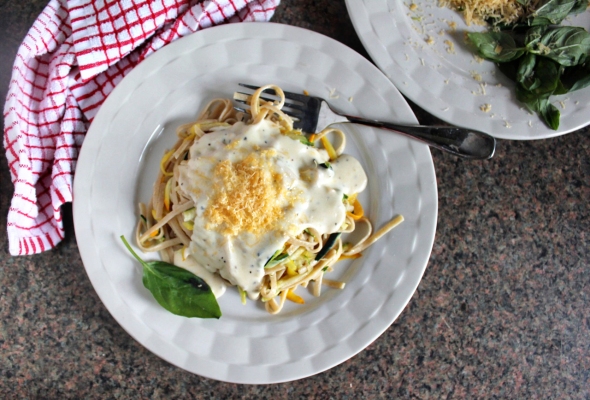
Posted: 29 August 2012 Filed under: Cheese, Food, Italian, Pasta, Vegetables | Tags: Zucchini 2 CommentsThe other day two of my favorite things combined in a glorious moment of food zen. Zucchini and smoked gouda cheese. Wait, you haven’t had smoked gouda cheese, you say? Get thee to the store and a wedge as quick as you can. I find it at Whole Foods in the giant cheese section. This cheese is awesome. It’s like Parmesan but with a nuttier flavor and a dark orange color. It’s fairly stinky with lots of good sharpness on your tongue. I like to enjoy it on crackers. Or plain. Oh, and melted into a creamy alfredo sauce.
I realized as I went through my blog archives the other day that I have posted a lot of recipes revolving around zucchini. I can’t say that I’m sorry about the saturation of zucchini-related posts….it’s an awesome summer time veggie that everyone loves. I hope. It’s also incredibly versatile. You can make it into breads and muffins or you can grill and saute it. Just tonight I shredded it and used it in a ground meat mixture for stuffed peppers.
But enough about that. Let’s talk about alfredo. I think alfredo sauce is one of those things that people often fear because of its creamy nature. Cream sauce requires some nuance to get the thickness without scalding or burning. Let me tell you. It’s not that hard. As long as you use the right ingredients, you can do it without much difficulty. Heavy cream, real milk (not skim) and cheese are all required ingredients. It’s just not something you can make ‘light’ without sacrificing the taste or texture. So, compromise. Use whole wheat noodles and bulk up the dish with shredded zucchini. Yes, I might be a genius.
Also, this is possibly the fastest recipe ever. You might need 15 minutes to get this one ready. If you boil the noodles while preparing the sauce, it should all be ready at the same time. Again, genius. You’re welcome.
Zucchini and Fettuccine Alfredo
serves two
4 ounces whole wheat (or brown rice) fettuccine noodles
2 cups shredded zucchini
Several sprigs of fresh basil
for the sauce
1/2 cup heavy cream
1/2 cup water
1 cup milk
3 ounces smoked gouda
1-2 teaspoons flour
black pepper, garlic and salt to taste.
In a large sauce pan, bring the noodles to a boil. Cook until tender. Remove the noodles from the water, reserving the hot water. Drain the noodles.
Place the shredded zucchini in a small metal colander or a steaming basket over the reserved noodle water. Steam the zucchini until just tender. Toss with the noodles, lightly season with salt and pepper. Toss several sprigs of fresh basil in with the noodles and zucchini.
In a small sauce pan, combine all sauce ingredients over medium heat. Stir every thirty seconds with a spatula to keep the sauce from sticking. Once the sauce begins boiling, whisk gently to incorporate all the ingredients. Let the sauce simmer to thicken for 5-7 minutes. The sauce will also thicken upon standing. If you’re having a hard time getting the sauce to thicken, sprinkle a small amount of flour into the pan and whisk to combine.
Pour the sauce over the zucchini and noodle mixture. Garnish with fresh ground black pepper and light sprinkle of shredded smoked gouda and some extra basil. Serve immediately.
Tart Cherry Cobbler
Posted: 19 July 2012 Filed under: Baking, Desserts, Food | Tags: Cherries, Cobbler, Fruit Pies 5 CommentsMy sister has a cherry tree in her yard. The same sister that also has an apple tree. She has a wealth of fruit trees in her yard and lucky for me, she leaves the fruit for the birds. And by birds I mean, she leaves them for thieving little sisters. That’s me. Thus, the wealth of apple-related posts last fall. Today we move into cherry territory. Okay, so it’s actually just one recipe but I’m still pretty excited about it.
Things that I learned – tart cherries are the cherries you want to make all baked goods with. Sweet cherries are for eating raw, tart cherries are for baking. All of these years I was wondering why anyone would want a tart cherry tree. Well, clearly you have a lot more options with tart cherries than you do with sweet cherries. You technically CAN bake and can and freeze sweet cherries and of course they’re delicious just as they are. But tart cherries can also be eaten (I ate some, trust me) and they do better in baked goods.
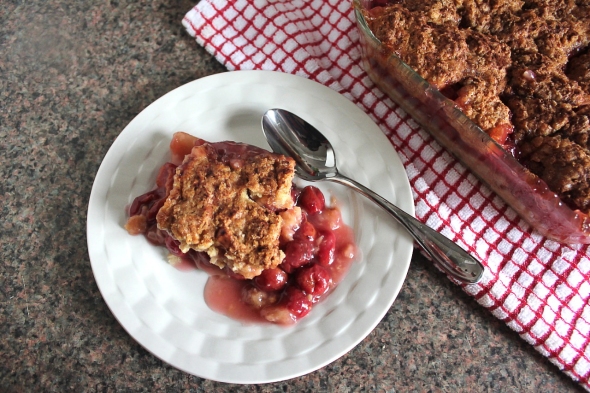
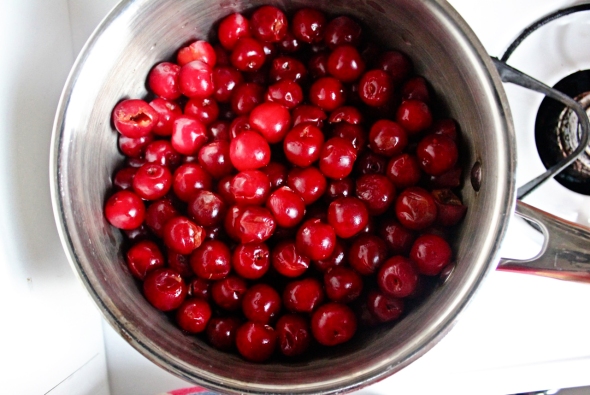
Pitting cherries is a pain in the butt and if I ever plan to harvest all of the cherries I can off her tree, then I’ll be investing in one of those cherry-pitting machines. It was totally worth the time but I can’t say I’d be too amused if I was going to make multiple cherry-based items. Cherry jam crossed my mind and quickly uncrossed it after about five minutes in the pitting process. This was my pot of pitted cherries for one 8×8 cobbler. I can only imagine how many you’d need for jam.
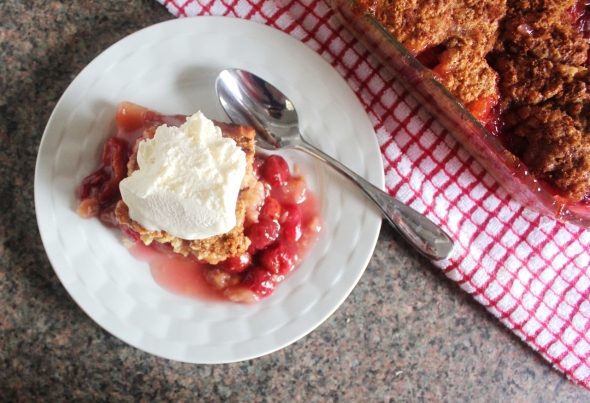
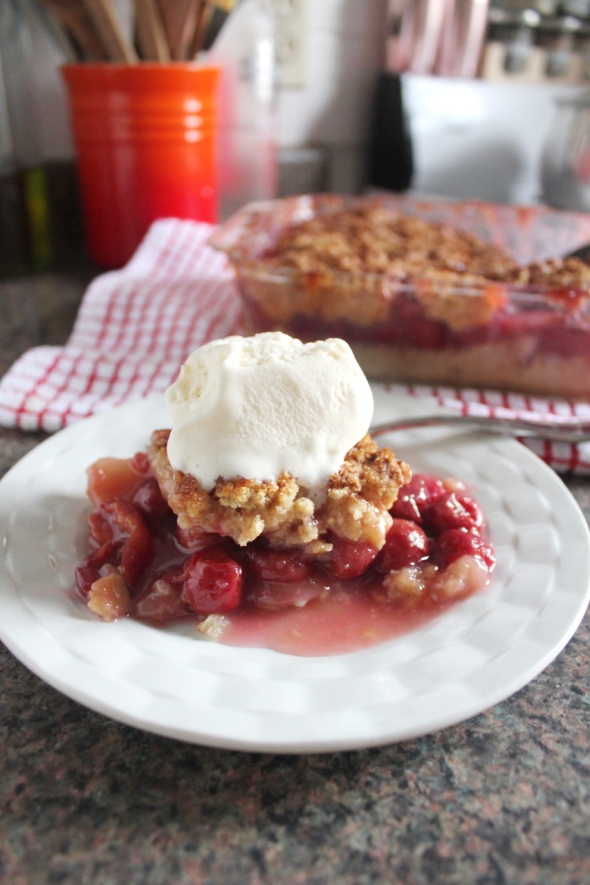
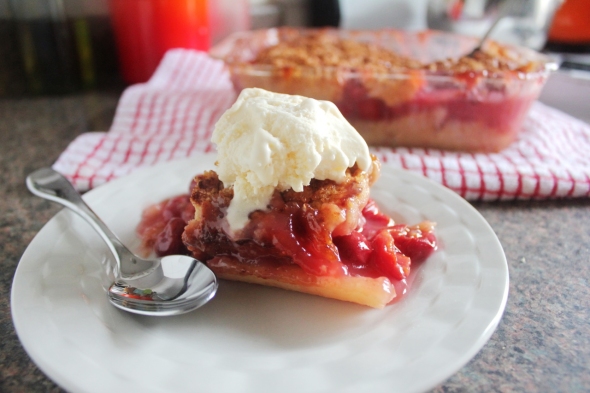
The last thing I learned is that baking with fresh cherries is a LOT different than buying the canned goop. The recipe for filling can be pretty watery but it also thickens quite nicely. So while it looks runny at first, it actually firms up a lot better than the canned stuff. In all of these pictures the filling is still pretty warm but now that it’s cooled completely, the filling isn’t very runny at all. Who knew?
I was actually worried that Senor and I wouldn’t like this dessert. Neither of us are crazy about cherry pie and we are both vehemently opposed to maraschino cherries. Which is to say, I’ll eat them but I’m not happy about it. So I was nervous that it’d be a lot of work and we wouldn’t really even enjoy it.
Happily, I was wrong! When Senor went back for a second slice, it sealed the deal. The tart cherry cobbler was a success and I could once again display my backyard harvesting efforts with pride and delight. Up next, I’ll be scouring my sister’s yard for blades of wheat that I can grind up and turn into my own bread.
Tart Cherry Cobbler
for the crust
1 1/3 cup flour
1/2 lard/shortening
1 teaspoon salt
5 tablespoons cold water
for the filling
5 cups tart red cherries, pitted
1 1/2 cups sugar
1/4 cup water
7 teaspoons flour
1 teaspoon lemon zest
for the topping
1 cup flour
3 tablespoons sugar
3 tablespoons brown sugar
1/2 teaspoon baking powder
1/2 teaspoon cinnamon
3 tablespoons butter
1 egg, beaten
3 tablespoons milk
Start by pitting the cherries. An easy way to pit cherries to rest the cherry on the top of an open, empty wine or soda bottle with a small top. Alternately, a soda can will work as well, so long as the tab is opened and the can is empty. Use a chopstick to push the pit through the cherry and into the can or bottle. If you can be picky, get the biggest cherries you can find. This means less time pitting!
Once they’re pitted, heat your oven to 400 degree.
Places the cherries in a colander and rinse well. Let them drain while you ready the crust. Give them a few tosses to make sure there isn’t any extra water hanging out in there.
Prepare your crust. Cut the lard or shortening into the flour and salt. Add 4-5 tablespoons of cold water, depending on how sticky the dough feels. Knead it into a ball. Turn out onto a floured work surface and knead gently until the crust is mostly smooth. Using more flour, roll out the crust to about 1/4 inch in thickness. Transfer the crust to a greased 8×8 baking dish. Trim the crust all the way around so that it covers the bottom of the dish and comes up around each side about 1/4 of an inch. Poke the crust a few times with a fork.
Now that the crust is ready, place the drained cherries into a large sauce pan on medium heat. Combine sugar, lemon zest and water. Stir to incorporate. Sprinkle the cherries evenly with flour, using 4 teaspoons to start. As the cherries heat, add additional teaspoons if necessary. The mixture will get bubbly and should start to thicken. Remove from heat and pour the mixture into the pie crust.
Combine in a bowl the egg and milk. Whisk until combined and slightly frothy. Add softened butter and the dry ingredients. Mix with a spoon until just combined. Spoon up the mixture in dollops and place as evenly as possible around the dish on top of the cobbler. Sprinkle the topping with a light layer of brown sugar and ground cinnamon.
Bake for 20-25 minutes at 400 degrees or until the topping is evenly golden brown and the mixture is bubbling. Let cool for at least an hour before serving. Serve with vanilla ice cream whenever possible.
Margherita Goat Cheese Pizza
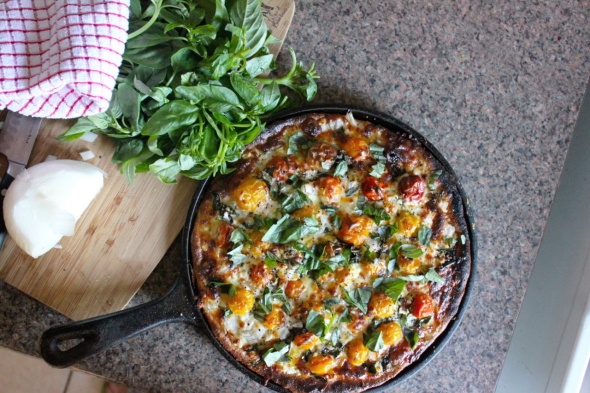
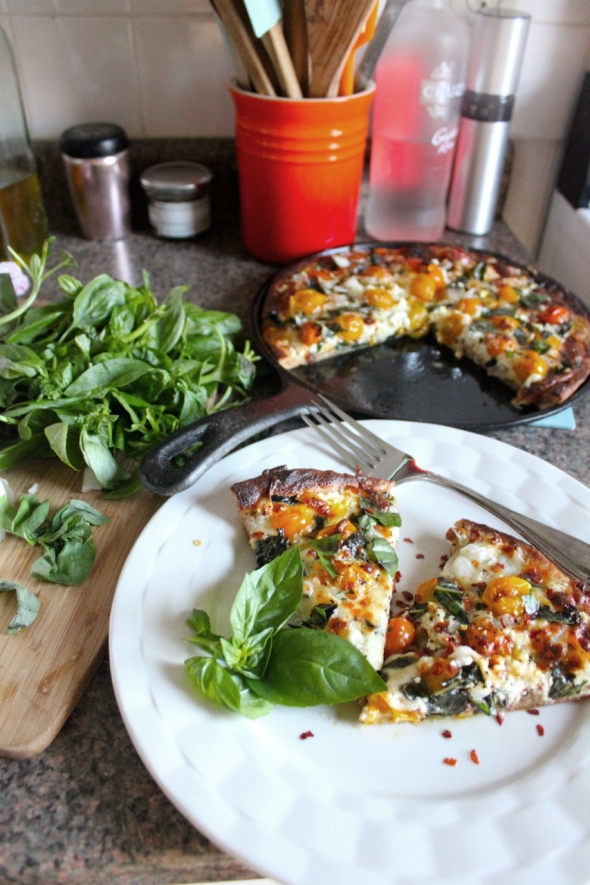
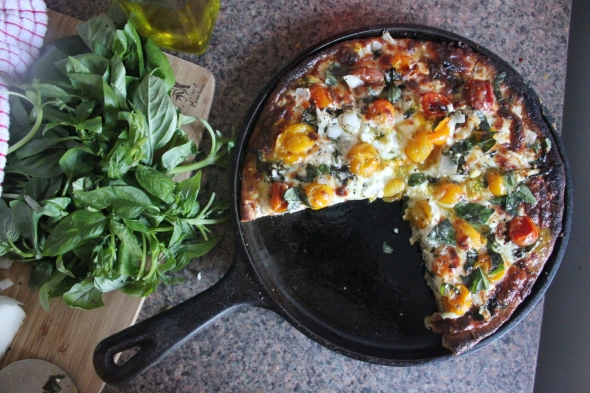
Posted: 13 July 2012 Filed under: Farmer's Market, Food, Italian, Pizza, Tomatoes 4 CommentsThere are about a thousand and one things to love about the farmer’s market. One of the things that I love is when you buy a bunch of herbs for one dollar . . . and you go home with a bunch that fills an entire shelf in your refrigerator. On Tuesday I bought fresh basil and heirloom cherry tomatoes. I contemplated making a pasta dish or a casserole or even a salad but I think I knew when I bought them that they were destined to become a pizza.
There are a lot of really good pizza places around us, that probably happens in most metropolitan areas, yes? You know those really good pizzas that are full of ingredients you’d never think of? I love those. We had our rehearsal dinner at one of my favorite pizza spots, and with good reason. In past weeks I’ve enjoyed a pizza topped with sausage, pepperoni, bacon, pineapple and banana peppers; a pizza topped with garlic mashed potatoes, bacon, broccoli, cheese and green onions; a pizza I like to think I invented and is the best thing ever – chicken, pineapple, goat cheese and red onions; and a pizza topped with barbecue chicken, mushrooms, banana peppers and onions. There were others in there too, but those were my favorites.
I rarely feel the need to recreate what my favorite places can make for me. And to be completely honest, I never order a pizza at a restaurant that I could easily make at home. I want unique, amazing toppings. I want complex flavor layers and ingredients I’d rather not mess with at home (read: pineapple, mashed potatoes) and I almost never want to order the traditional American pizza of red sauce and salted meat. Don’t get me wrong, I’ll eat it. But we’ve probably all eaten our fair share of the plain, boring pizzas and could do with some new flavors. **This does not mean that when confronted with a traditional NY pie I will try to fancy it up. No, I will take that giant, flat piece of pepperoni pizza, fold it in half and shove it into my face. Some things are sacred.
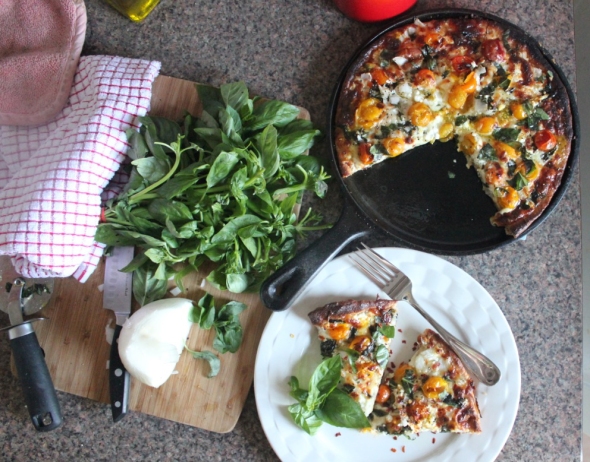
When I thought about turning my basil and heirloom tomatoes into a pizza I was quite nearly giddy just at the thought. I settled on a slight twist to the classic Margherita. First because I had all the ingredients on hand. Second because I never order Margherita pizzas. I can crush tomatoes and rip up basil on my own time, thank you very much. The goat cheese. Oh the goat cheese. The goat cheese is there because goat cheese makes everything better. Everything. I tossed on some onions as well because caramelized onions are like vegetable candy.
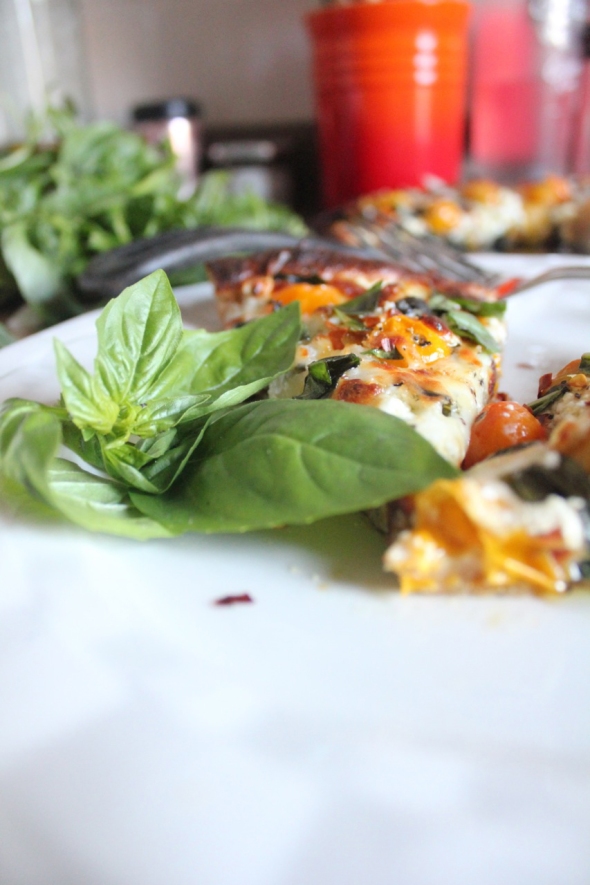
This was a pretty damn delicious pie. The honey wheat crust was crisp but chewy. The heirlooms roasted and when lightly crushed, gave the pizza a sweet, flavorful sauce. The goat cheese made everything perfect, as it does. The basil under the cheese gave tons of flavor while the basil on top of the cheese got crispy and reminded me of bacon. I’m not sure why, but it was good so I suggest you try it. This recipe made two pizzas, one 10 inches and the other 12 inches with crust that were ‘original’ thickness. It would easily make three thin crust pizzas as well or two 12-inch pizza of medium thickness.
So, what are you waiting for? Tomatoes and basil are in season. Now is the time. Ready, go.
Goat Cheese Margherita Pizza
for the crust
2 1/4 teaspoons dry active yeast
1 cup warm water
2 1/4 cups whole wheat flour
1 teaspoon salt
1 tablespoon honey
Dissolve the yeast in a small bowl with the warm water. Stir with a wooden spoon (not metal) and let sit for 10 minutes until the mixture is creamy.
In a medium bowl, combine the flour, salt and honey. Pour in the yeast mixture. Mix with a wooden spoon by hand until the mixture comes together into a ball. Place on a floured surface and knead, adding more flour if the mixture is too sticky. Knead until the dough is relatively smooth, about two minutes. Place the dough back in the bowl and cover lightly with a towel. Let rise for 10-15 minutes.
for the toppings
4 tablespoons olive oil
1 large bunch fresh basil
1/2 white onion, chopped
3 cups cherry tomatoes
1 cup goat cheese
3 cups shredded mozzarella
garlic powder
sea salt
coarse ground black pepper
Heat oven to 400 degrees. Slice the dough in half and roll out the first pizza to your desired thickness. This dough gets poofy so if you want it really thin, roll it out very, very thinly.
Drizzle a tablespoon of olive oil over the crust. Sprinkle the crust with garlic powder and some chopped basil. Use just enough so that the crust is lightly covered in basil.
Top with one cup of shredded mozzarella, followed by the chopped onions. Add the tomatoes, whole, spacing them as evenly as you can. Then add large pieces of torn basil. Use as much as you’d like, the more the better. I try to make sure there’s enough basil for some in each bite.
Add half of the goat cheese and another half cup of shredded mozzarella. Drizzle the top with another tablespoon of olive oil.
Finally, season lightly with sea salt and pepper.
Place in the oven on a medium rack. Bake for 10-15 minutes or until the crust is golden and the cheese in the middle has melted. If desired, place the entire pizza under the broiler for 90 seconds. This will crisp the crust edges, melt the cheese completely and roast the vegetables to perfection.
Let stand for five minutes before serving. Using a fork or mashed potato masher, smoosh the tomatoes that haven’t burst open.
Serve with crushed red pepper and fresh basil.
Grilled Chicken
Posted: 12 July 2012 Filed under: Chicken, Food, Grilling Leave a commentIt shames me to say it but I’ve only just finally realized the full potential of my charcoal grill. Senor and I grill pretty regularly in the warmer months. Everything from whole chickens to steaks to corn on the cob. Usually we’re pretty good at multitasking. We’ll make a beer-can chicken and surround the grill with corn on the cob so everything for our meal cooks in one place. Smart, right? Sort of. Not as smart as say, grilling a week’s worth of something all at once and then storing it for super fast lunches, dinners and snacks.
I was reading a magazine and there was a letter from a reader that said her big time-saver for weekday meals was to grill whole family packs of whatever they were having for dinner. So simple, yet so genius. Instead of grilling one chicken, do three. Instead of four chicken breasts, do 16. Instead of two pieces of fish, do the whole bag of frozen filets. And since it doesn’t take any longer for eight chicken breasts to cook than it does for two, you’re not really doing any extra work. Huh. Chicken is the most popular meat in America and it’s shocking how truly terrible chicken can taste. Dry, flavorless, sawdust. The good news is, making really tasty chicken isn’t actually that difficult.
So on Monday we marinated eight boneless chicken breasts and two bone-in breasts. The bone-in were for dinner that night, the other eight for lunch salads, sandwiches and possibly pasta dishes later in the week. An additional upside is that the boneless chicken breasts we bought at Whole Foods offer a bulk discount if you buy at least three pounds of meat. That’s helpful.
The key to grilling chicken is to know how to do it right. Marinate the meat. Pound boneless breasts flat so they cook quickly and evenly and each bite has yummy marinade/charcoal flavors. Use intense heat to sear the outside and keep them juicy. The quicker you cook the chicken, the more moisture it will retain.
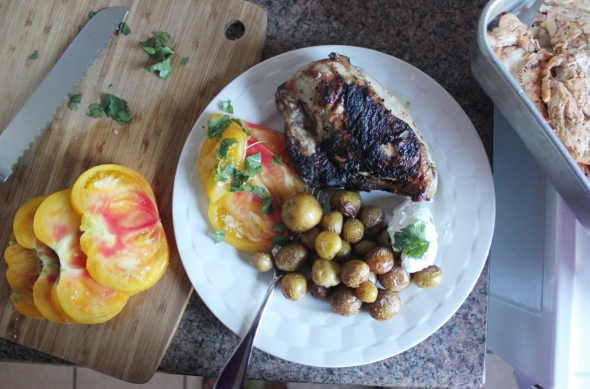
We paired the bone-in breasts with some teeny tiny little Yukon gold potatoes, roasted with salt and olive oil in the toaster oven and some sliced up heirloom tomatoes sprinkled with sea salt. Delish.
Grilled Chicken
8 boneless chicken breasts
2 bone-in chicken breasts (optional)
1 lemon
2 tablespoons olive oil
Mrs. Dash’s garlic blend
garlic powder
sea salt
coarse ground black pepper
crushed red pepper
Start by pounding your boneless chicken breasts with a meat tenderizer. Use the flat side and pound them so they’re an even thickness. You don’t want them to be too thin, just even throughout.
Make a marinade. This is really easy to do and you can use any combination of flavors you’d like. For a traditional flavor, put some garlic powder, sea salt, black pepper, crushed red pepper flakes, and Mrs. Dash’s Garlic Blend into a gallon-sized Ziploc bag. You don’t have to measure, just dump some of each into the bag. Once you have it mixed up you may want to add more of something. Squeeze a lemon or lime into the bag with the seasoning. Add a few tablespoons of olive oil. Add the chicken. Fill the bag with water until the chicken is just covered. Stick in the fridge and wait until you’re ready to grill to take it back out. You want it to marinate for at least two hours.
Get your charcoal ready. We used natural log/chunk charcoal and a chimney starter. This gives really intense heat which is perfect for charring and searing meats. The larger pieces stay hot for much longer than regular charcoal. Make sure to use enough charcoal to cover the entire grilling surface with heat.
Once the charcoal is ready, remove the chicken from the bags and place directly onto the grill. You want to cook them quickly and over high heat. If you’re grilling bone-in breasts, place those in the center and hottest part of the grill. They’ll need to cook longer than the boneless breasts. Leave the lid open, flipping them once they have nice brown grill lines. The boneless breasts will only need to cook for about four minutes on each side. Make a small cut in the middle of one to check that the meat isn’t pink. Remove the breasts from the grill and place in a covered pan.
Hello, friends!
Posted: 11 July 2012 Filed under: Fish, Food, Seafood, Weddings | Tags: Caribbean, Lobster, Seafood, St. Croix 3 CommentsI’m back!!!!! Last night for the first time in probably 8 months I took a photo of what we made for dinner. That post is coming soon.
To sum up, Senor and I got married on June 7th in the US Virgin Islands. It was AMAZING. We showed up with our families and wedding clothes and our planner took care of the rest. We snorkeled every day and we didn’t get out of the water until 3pm on the day of our wedding. It was perfect and I could not be happier with our decision to have a very low-key destination wedding. Here are a few photos.
We had a wonderful time, a wonderful wedding planner, and all around, an unbelievable wedding. Although we were a relatively small party, 20 of our closest family and friends came with us, it was perfect. We were able to spend quality time with everyone and still enjoy a relaxing vacation. During our ceremony I looked around and we had a lot of spectators sitting on the beach. After such a long engagement and looking forward so much to the day it was almost surreal. Looking at the pictures, it’s hard to understand why everyone doesn’t get married on the beach. Look how pretty!
We also had a reception back home in Minnesota. It was also pretty low-key. It was a bit more work (as opposed to none at all on the island) because it was in my sister’s back yard. We had a beautiful setting though and a tent (which we thankfully did not have to set up) which gave us the perfect venue. We set and decorated the tables a few hours before our guests arrived. And the one thing I was dead set on having for my wedding, peonies, managed to happen despite the early spring this year. I was delighted.
Before we get back to posts with recipes I want to mention some of the food we ate in St. Croix. It was some of the best eating we’ve ever done and it’s a big part of why we want to return there next year. The on-beach cottages and turquoise blue Caribbean sea play an additional role in that. Señor revealed later that he was actually worried the food on the island would be sub-par. Silly, silly man.
Sadly, I do not have photos of the best meal I had on the island. I know! I didn’t take a single picture the first two days and then realized how very stupid that was. I’ll be back some day and I’ll take a picture of the Manchego Crusted Scallops from Rumrunners when I return. They might be worth the trip all by themselves.
When we go out I make an effort to only order what I can’t make easily myself. I can happily say I’d never make any of these dishes at home (lack of fresh seafood and too much effort if I’m being honest) and they were all pretty memorable.
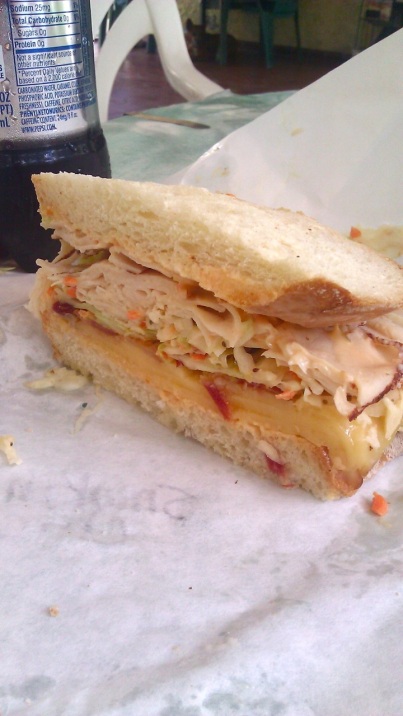
Two sandwiches from Turtle’s deli – one with Ham and pineapple, the other a killer combo of chicken, smoked gouda and coleslaw. This one was to die for. This is half the sandwich, btw. This place was just up the road from our cottage and I’m sad we didn’t go there until the last day. We should have gone daily.
Drinks at Rumrunners. One of the things about being a mile away from a rum distillery is that 1 – the rum is cheap 2 – the rum drinks are delicious and 3 – if you’re in the Caribbean in June it’s probably hot so you’ll want frozen, icy drinks 24/7. This was my fourth pina colada in three days.
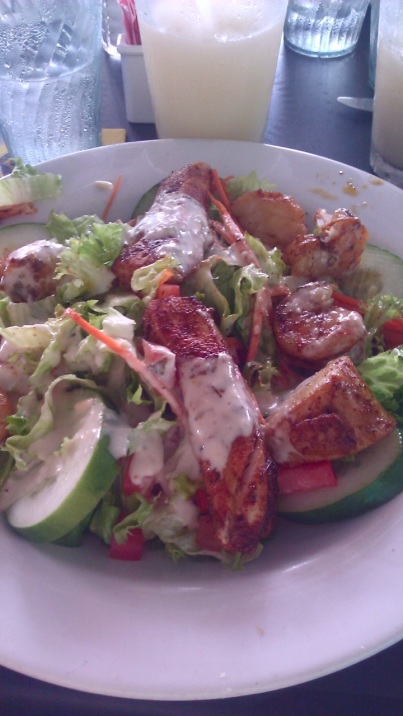
The seafood salad at Rumrunners. Really yummy. There were scallops, shrimp and MahiMahi on this baby. The scallops are seriously amazing.
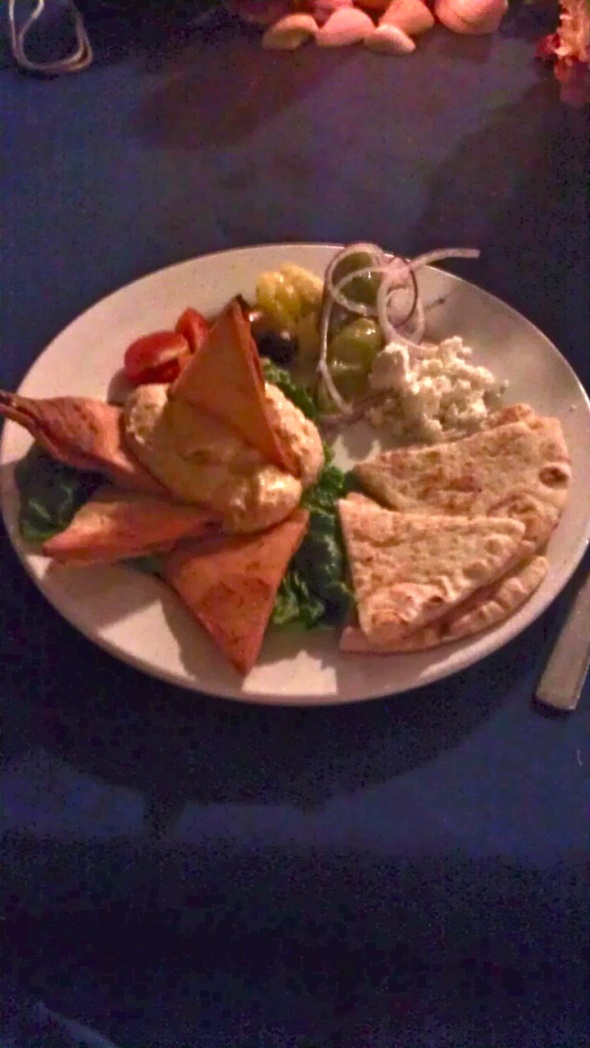
Our reception post ceremony was held at the Beachside Café next to our resort. One of the options from our wedding night reception was a hummus plate that was a meal in itself. I ate it all. Which why I couldn’t finish the entree.
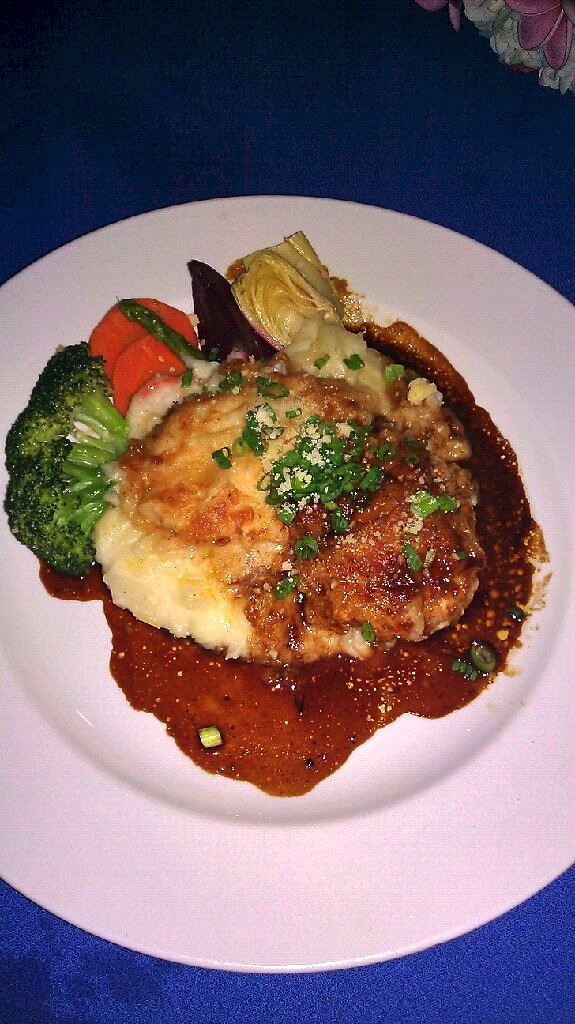
I followed the hummus plate with their Honey Buttermilk Chicken Breast in a Cheddar Chive Sauce.
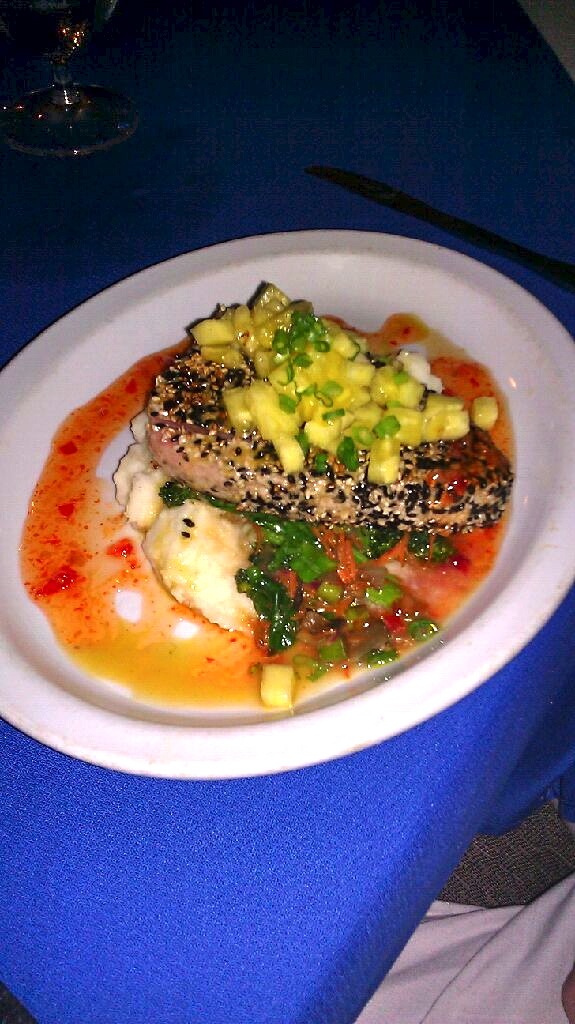
Senor opted for the Sesame Soy Ginger Glazed Tuna with Pineapple Salsa. Let’s just say the photo doesn’t do it justice.

On our last night we went back to the Café. I had the Lobster Oscar which is a fancy way of saying a lobster stuffed full of crab. I prefer to eat my seafood stuffed with more seafood.
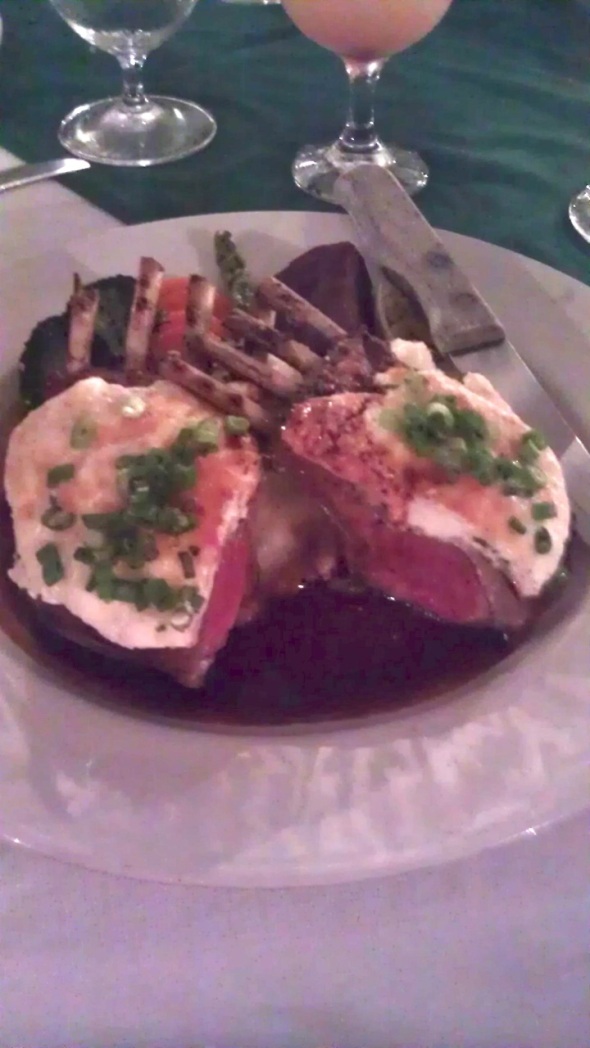
Senor made another stellar menu choice, going with the Goat Cheese Crusted Rack of Lamb. SO delicious. Melted right in your mouth, topped with creamy goat cheese. Just amazing.
A few meals that I didn’t get pictures of include a crab-stuffed avocado, a beautiful steak salad, a surf-and-turf special, banana nut rum french toast and huge breakfast burritos. I think Señor was jealous of my breakfast burritos when they came out but being the nice lady that I am. I shared with him.
We’ll return to our regularly scheduled programming, i.e. food blogging for reals with the next post. After a visit to the farmer’s market this morning, I’ve got six bags of producing ready for action. The baby heirloom tomatoes, fresh basil and zucchini will be making a starring appearance sooner rather than later. 😉
Cherry Cake Cream Pop
Posted: 2 March 2012 Filed under: Food 2 CommentsSenor and I are getting married on the sandy beaches of the Caribbean in 97 days. I am so excited. And so over booked with stuff to do, get, make, arrange, plan, etc. It’s fun and I love doing it but it leaves almost no time for anything else. My weekends are booked solid and my to-do and to-buy list never seems to shrink.
Last weekend I managed to address all of our invitations. Woot! But I still have to print them all off and still need to address the RSVP envelopes. So, my work is far from done by simply addressing them all. Once we send them off, almost everything major will be taken care of. Senor has his suit and shoes. My dress is in production. I have my shoes. We have our flights and room reserved. We have the home-reception planned and we’ve got contracts with a caterer and a rental company and an indoor, back-up venue. All in all I feel like things are moving ahead without too many issues.
Things happen in the Caribbean a lot differently than they do here. Wedding planning comes together in the last few weeks to the last few days. I tend to like to do things well in advance and have everything squared away (and written down in a check list) months ahead of time and that just isn’t how things operate there. Part of me loves that because I do want a laid back wedding. Part of me wants to cry at the thought of having to think about ideal photographers or bouquet styles while I’m on my vacation. I’m pretty sure I’ll survive though and if I freak out about something stupid like boutineers, I’ll just jump in the ocean and hug a sea turtle to calm myself down.
I really want to hug a sea turtle. I’ve asked Senor multiple times if he thinks I’ll be able to. I want to be in the water and have a sea turtle hanging out with me and I want to wrap my arms around him/her and give him/her a hug. There’s you tube videos of people hugging lions. I want to hug the sea turtle. I could probably live with hugging a dolphin. Still….I want those little legs in this picture.
Anyway, Wee Foodie is on a continued sabbatical until post wedding. It’s impossible to post anything anyway. I don’t cook! Okay, I do. But nothing fun or exciting. I have zero time for recipe development and Senor is on this crazy diet that makes him impossible to cook for. Unless a mound of beef on a pile of spinach is what you’re looking for in a recipe? I’m guessing no. I’ll do my best to pop in every once and a while before the wedding but will definitely be back this summer in full swing.
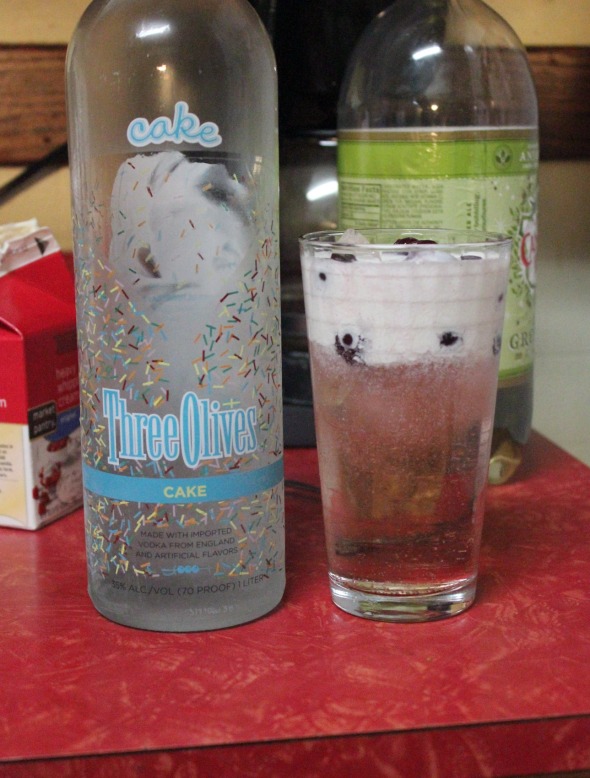
To tide you over (I know you’re anxiously awaiting my full return after all) here’s a crazy delicious drink that looks as sweet and innocent as a sock hop in 1955.
The Cherry Cake Cream Pop was first created two months ago on New Year’s Eve. I really meant to share it sooner. It’s easy and delicious and awesome. In fact, I think I’ll have one tonight. After I address those RSVPs.
Its name explains it all. Frozen cherries, cream, cake vodka and the bubbly awesomeness of ginger ale. Bars should start making these post haste. If you can get an apple pie shot, I should be able to order one of these lovelies.
The key ingredient is the Three Olives Cake Vodka. It is awesome. Amazing. The first bottle I had broke as we unloaded the car and my hand smelled like cake but I had nothing to drink. I seriously almost cried. Senor went across the street to the liquor store and bought a replacement, thankfully. I always have this in the freezer now. It can stand in for vanilla extract in a pinch. And also, you can drink it. Which is what I use it for 99% of the time.
Cherry Cake Cream Pop
1 oz (1 shot) Cake Vodka (Three Olives Brand)
5 oz Ginger Ale
0.5 oz heavy whipping cream
8-10 frozen cherries
Ice
Add your ice and cherries to your glass. Gently crush the cherries slightly.
Pour in 2 ounces of cake vodka. Fill the glass the rest of the way with ginger ale. Top off with heavy whipping cream. Finish with a 3-4 more cherries.
If you want, give it a stir to incorporate the cream. Note* These pictures are from New Year’s Eve and you had better believe that I did zero measuring while pouring.
Whenever I make these at home I use diet Ginger Ale since there’s plenty of calories in the vodka and cream! I also make it really often (more often than not) without the cream. It’s still super delicious but a lot less decadent and it’s not quite as pretty either. But you can also drink more than one. It’s a tough decision but I’m sure you’ll make the right choice.
Roasted Pumpkin Orzo
Posted: 7 December 2011 Filed under: Eggplant, Food, Orzo, Pasta, Pumpkin | Tags: Eggplant, Orzo, Roasted Pumpkin 1 CommentWeather plays such a big role in what we eat and when we eat it. Lately I’m having a hard time thinking up new recipes. I think it probably has something to do with the fleeting hours of daylight, the sub-zero temperatures and knowing full well that at least in Minnesota, nothing is growing any more. It makes it harder to figure out what to make and I usually end up resorting to some old favorites. Beef bourguignon. Beef stroganoff. French onion soup. Senor’s pasta. Lasagna. Essentially, a lot of meaty or carby dishes and a lot of soup. Oh, and a LOT of squash, cut in half and roasted. Eaten with a pat of butter.
Honestly, it makes me feel like I’m stumped. I know that Senor loves a lot of these recipes and looks forward to them as the reward for enduring cold weather. I do too. I never remake a recipe we don’t both love. This is definitely a time of year where I have to look for inspiration from other sources though. In spring, summer and fall I walk through the farmer’s market and look to see what’s ripe and delicious looking. I feel inspired by all the food in season and every single meal is based off of what produce is in season right that moment. Whole meals are inspired by a giant bunch of super fragrant cilantro. It’s a lot harder to be creative, I think, when the only things in season are essentially what you’ve got in your freezer. On the off chance that I do make something new and creative and delicious….you’re probably not going to see a picture of it. The sun rises at 7:40 and sets at 4:30. I’m either at work or en route to work during that entire time. Maybe, just maybe we’ll get lucky. Maybe we’ll have a bright sunny weekend and I will be inspired to make a variety of new dishes to share with you all.
I made this recipe right as the fall vegetables started to finish off here. For now, we’ve got root veggies and citrus fruits from Florida. I’m trying to make the best of it. You’ll see some additional squash recipes coming soon. And ultimately I’m probably going to break down and buy the asparagus from Peru and the green beans from Chile. I’m not happy about it. Whether or not I can make anything really delicious and interesting out of them remains to be seen. I promise to do my best.
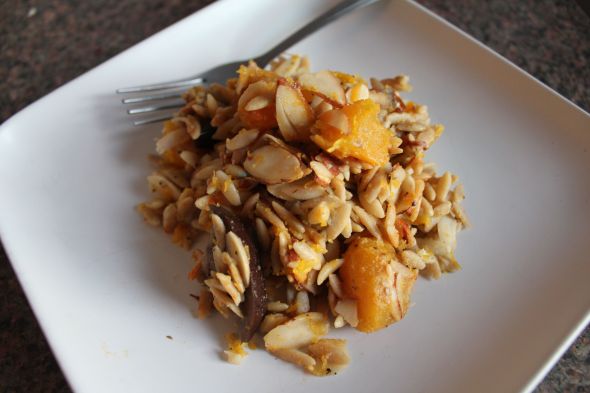
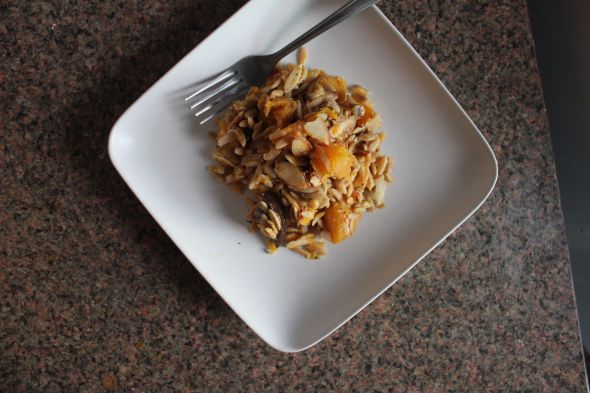
Luckily pumpkin can be bought in a can if you can’t find a fresh one. Eggplant is one of those fall veggies that stores pretty well so you can still find it and enjoy it during the colder months. And the really great news is that pumpkin, eggplant, sliced almonds and orzo go really well together. This was satisfying but not nearly as heavy as spaghetti with meat sauce, or a giant square of lasagna.
Roasted Pumpkin Orzo
serves four
1 medium baking pumpkin
1 large eggplant, cubed
8 ounces whole wheat orzo
3/4 cup sliced almonds
1 tablespoon olive oil
1 cup dry white wine
Salt, Pepper, garlic powder, smoked paprika
If using a fresh pumpkin, cut it in half and clean out the insides. Situate the halves face-down in a baking dish, along with a half-inch of water. Roast in a 400 degree oven until tender, about 30 minutes. Remove from the oven and let cool.
If you’re using canned pumpkin, you may not be able to cut it into pieces to toss with the pasta. It will probably work better if you simply simmer the canned pumpkin with the white wine and olive oil and make a thick sauce to coat the pasta. It’ll be delicious either way.
Let the pumpkin cool so it’s workable. Meanwhile, boil the orzo. When tender, rinse and drain the orzo until you’re ready to use it.
Once the pumpkin is cool enough to work with, peel the skin off of the flesh. Cut the pumpkin into small cubes. It should be soft but not overly squishy.
In a large skillet, heat the oil and add in the eggplant. The egg plant will absorb the oil, so occasionally add a few tablespoons of water to keep the pan from drying out. Saute the eggplant until soft. Add the white wine, pumpkin and drained orzo. Reduce the heat to low.
Sprinkle the skillet with salt, pepper and garlic. Add a few shakes of smoked paprika and toss gently. Let the mixture simmer lightly until the sauce is slightly thickened and the pumpkin has spread evenly.
Remove from heat. Stir in the almonds, saving a few for garnish. Serve immediately.

